Yesterday was St. Patrick's Day and I would like to say that I will be writing all about how I corned my own beef, but I didn't. I went to a party and ate the corned beef there. It was delicious and lovely and I had a great time. But I was so distracted drinking Guinness and gabbing away like a good Irish lass that I didn't eat as much as food as one might like to eat at a St. Patrick's Day party. So when we got home DR made me a good old French omelette in the style of Julia Childs. This is the most unbelievably simple thing in the world, and I bet you've been doing it wrong all this time. Learning this has been like a religious conversion and I think it's best if Julia tells you herself how it's done.
If you don't have time to watch this, you are missing one of life's delights, but I will sum up.
Chop up some parsley first. Then crack two eggs in a bowl and beat them together, perhaps add a bit of water and salt and pepper. Heat an omelette pan on the stove til it is good and hot. Melt a tablespoon of butter, until the foam dies down, but don't let it turn brown. Pour your egg mixture into the pan, let it settle a couple of seconds then begin jerking the pan towards yourself until the omelette comes off the pan and folds onto itself, then flip it onto a plate and garnish with a little chopped parsley. This should take about 30 seconds total. Brilliant.
Thursday, March 18, 2010
Tuesday, March 16, 2010
Parsnip and Apple Has with Pork Chops or Monday Night
One of the joys of this project is that sometimes on a Monday night, after working all day, you just end up with a home cooked meal that looks like this. It might be at 9pm, but this is the kind of meal you can expect if you are a nice uncle who takes his nephew on adventures so his mom can work in peace.
 I found this recipe for Parsnip-Apple Hash that I cut out of the newspaper way before I could identify a parsnip in a root vegetable line-up. I was digging through my box of recipes looking for a carrot bread recipe to make use of the glut of carrots we keep accumulating when I stumbled on this one. I also happened to have some parsnips from our Farm Box, so this seemed like a great idea.
1/2 cup diced bacon (I know! I've been meaning to make more bacon, but I want to get the pork belly from this new butcher shop in Los Feliz, and I haven't been over there, and it takes a week, and all that. Not to mention that it is mainly salted meat, and we decided a long time ago that salt doesn't count if it is the only ingredient. Anyway, I bought 4 slices of bacon at my local butcher. Sue me.)
3 Tbs unsalted butter
1 small onion, cut into 1/4 dice (about 1 cup)
3 parsnips, peeled and cut into 1/2 dice (This is supposed to equal 2 2/3 cups. Apparently these are parsnips from the land of Gigantor. I had six, petite parsnips and it added up to about 1.5 cups. I was worried, but it all worked out fine.)
1 apple, peeled, cored and cut into 1/2-inch dice (about 1 1/4 cups)
1 red bell pepper, seeded and chopped into 1/4 inch dice (about 1 cup)
2 tsp chopped fresh thyme (I didn't have this. Oh well)
Coarse Salt
Freshly ground pepper
Brown the bacon until crisp in large skillet over medium-high heat, about 5 minutes. Remove the bacon and set aside leaving the bacon fat in the pan.
 Add the butter to the bacon fat. (That's right, I said add the fat to the fat) and onions and cook, stirring until translucent, about 2 minutes. Add the parsnips, cover and cook, stirring frequently, until soft, about 10 minutes. Uncover and continue to cook until golden brown, stirring occasionally, about 5 minutes.

Add the apple, bell pepper and thyme (if you have it) and continue to cook, stirring until they carmelize a bit, about five minutes.

Stir in the reserved bacon. Season to taste with salt and pepper and serve with medium rare pork chops that were cooked by your handsome husband with butter, Pasta Seasoning (Ingredients: Onion, Garlic, Basil, Lemon Peel, Paprika, Fennel, Oregano, Black Pepper, Ginger, Thyme & Lemon Oil) and Season All (Ingredients: Salt, Spices (Including Chili Pepper, Black Pepper, Celery Seed, Nutmeg and Coriander) Onion, Paprika, Maltodextrin, Garlic, Silicon Dioxide (added to make free flowing) and Annatto for color) on the broiler for about 90 seconds per side, and a salad left over from Saturday night's dinner.
If you are really lucky, your handsome husband will also make his Grandmother's Hot Chocolate Pudding for dessert. And maybe someday he will write a post about it for you.

1/2 cup diced bacon (I know! I've been meaning to make more bacon, but I want to get the pork belly from this new butcher shop in Los Feliz, and I haven't been over there, and it takes a week, and all that. Not to mention that it is mainly salted meat, and we decided a long time ago that salt doesn't count if it is the only ingredient. Anyway, I bought 4 slices of bacon at my local butcher. Sue me.)
3 Tbs unsalted butter
1 small onion, cut into 1/4 dice (about 1 cup)
3 parsnips, peeled and cut into 1/2 dice (This is supposed to equal 2 2/3 cups. Apparently these are parsnips from the land of Gigantor. I had six, petite parsnips and it added up to about 1.5 cups. I was worried, but it all worked out fine.)
1 apple, peeled, cored and cut into 1/2-inch dice (about 1 1/4 cups)
1 red bell pepper, seeded and chopped into 1/4 inch dice (about 1 cup)
2 tsp chopped fresh thyme (I didn't have this. Oh well)
Coarse Salt
Freshly ground pepper
Brown the bacon until crisp in large skillet over medium-high heat, about 5 minutes. Remove the bacon and set aside leaving the bacon fat in the pan.


Add the apple, bell pepper and thyme (if you have it) and continue to cook, stirring until they carmelize a bit, about five minutes.

Stir in the reserved bacon. Season to taste with salt and pepper and serve with medium rare pork chops that were cooked by your handsome husband with butter, Pasta Seasoning (Ingredients: Onion, Garlic, Basil, Lemon Peel, Paprika, Fennel, Oregano, Black Pepper, Ginger, Thyme & Lemon Oil) and Season All (Ingredients: Salt, Spices (Including Chili Pepper, Black Pepper, Celery Seed, Nutmeg and Coriander) Onion, Paprika, Maltodextrin, Garlic, Silicon Dioxide (added to make free flowing) and Annatto for color) on the broiler for about 90 seconds per side, and a salad left over from Saturday night's dinner.
If you are really lucky, your handsome husband will also make his Grandmother's Hot Chocolate Pudding for dessert. And maybe someday he will write a post about it for you.
Sunday, March 14, 2010
Contraband
I thought it was important to let you know that occasionally some food item made with more than one ingredient finds it's way into my life. I have said before, but I think it bears repeating, that if you invite me over to your house, I will happily eat whatever you are serving. Whether it is Wishbone Salad Dressing, coffee cake from the supermarket bakery, fried Twinkies, or something made in a laboratory from sodium stearoyl lactylate and Yellow Number 5. I will not judge you, I will just be happy to be eating a meal I didn't have to make. Also, if I have reason to eat in a restaurant, I will order whatever I like. I don't go out of my way to eat in restaurants, but I don't go out of my way to avoid them either. I almost never pick up take out in lieu of cooking, or in any other way use it as an excuse, but in the normal course of being a person living in the city, opportunities to eat in restaurants arise, and I don't make any limitations on my orders. If it's not made in my home, it seems a little ridiculous to parse hairs on what "homemade" means. All this being said, I do make a pretty strong effort to keep these types of items out of my house. But every so often there are leaks in the seal. Sometimes it's me coming up with a harebrained justification in the grocery store for buying guacomole, and having to live with the guilt when I get home. Sometimes DR buys yogurt or salsa when he's at Trader Joe's unsupervised.... But I didn't feel I could let this one go unmentioned.
 This is the ingredient list. I think it is the longest one I have ever seen. Definitely the longest one since I began this project. In my defense, I did not buy these cupcakes. My mother-in-law brought them over on Friday when she came to watch Baby J while I was working. Now, in keeping with my hospitality rule, I think it is very bad manners to refuse gifts from people who are caring for your children for free, and I really don't like to let food go to waste, even when it's claims on being food are dicey at best. I thought you might enjoy a good old trip down memory lane as I list the component parts that are now part of my body:
Cupcakes Chocolate & White, Ingredients: sugar, vegetable oil (partially hydrogenated soy and cottonseed) mono and diglycerides, corn starch, natural and artificial flavors, salt, gums, polysorbate 60, Artificial color, water, cream, vegetable shortening (partially hydrogenated soybean &/or cottonseed oils, propylene glycol monoesters, mono diglycerides, lecithin, sodium stearoyl lactylate) cocoa with alkali, glucono delta lactone, Potassium sorbate, butter, enriched wheat, (thiamine mononitriate, riboflavin, folic acid), eggs, leavening (baking soda phosphate, aluminium sulfate), food starch modified, rice bran extract, fruitrim(TR) (fruit juices, natural grain dextrins), non-fat milk, soy lecithin, propylene glycol, monostearate, dextrose, caramel color, propylene glycol, citric acid, enriched wheat flour bleached (flour, niacin, reduced iron, thiamine mononitrate, riboflavin, folic acid) decoration (sugar, hydrogenated soybean oil, corn starch, lecithin, confectioners glaze, dextrin, cocoa processed with alkali, artificial colors (red 3, red 40 lake, yellow 5, yellow 6 lake, blue 1 lake) artificial vanilla flavor.) Artificial color (blue 1 & 2, Red 3 & 40)
There are 12 words in this list that the computer doesn't recognize.
This is what that looks like:

I have eaten two of them. Good gracious.
Saturday, March 13, 2010
Dijon Mustard
There was a time when a jar of dijon mustard would last in my fridge for up to a year. In fact, when I began this project in October, I was finishing up a jar and there were two full jars in the pantry, a surplus that meant we were prepared for the Big One, or the Apocolypse or a large Bratwurst party. I thought the day would never come that I would need to make my own with such bounty. Well as the variety of available condiments fell by the wayside, dijon mustard took on more and more importance. In fact, thanks to the genius of Thomas Keller, we practically can't even eat a roast chicken without it anymore. And since roast chicken makes a weekly appearance in our house, we ran out of dijon a few weeks ago. Yellow, Spicy Brown, Honey Mustard, we still have all of these and they each have their place. (However that place is mostly on foods I do not yet have the wherewithal to make...) So we have been feeling the loss of the dijon. So tonight we set it to right. I found this recipe on bigoven.com, it said it came from Colorado Cache Cookbook (1978). I am always comforted by recipes published in the 1970's, it's post the 1950's Cool Whip revolution of industrial food and before the onset of mass production of high-fructose corn syrup and the low-fat overthrow of the 1980's. The 70s, in my mind was a brief revival of real food eating. And Dijon mustard has a very 1970's feeling of sophistication. Like something you would serve on the side at a Fondue/Key Party.
2 c Dry white wine
1 c Chopped Onion (I used a shallot. I think it was fine.)
2 Cloves Garlic, minced
4 oz Dry Mustard (I only had 2 oz of dry mustard, and...Get ready to be shocked...didn't check this until I already started boiling the wine... but it was ok, I halved the rest of the recipe and used the leftover wine in a salad dressing)
2 Tb Honey
1 Tb Vegetable Oil
2 tsp Salt
4 drops Tabasco sauce (or whatever hot sauce you've got.)
 Combine wine, onion, and garlic. Heat to boiling. Lower heat and simmer 5 minutes. Set aside and cool.
Put dry mustard into a small sauce pan and strain cooled wine mixture into it. Beat until very smooth. Add remaining ingredients and heat slowly, stirring constantly until mixture thickens.

Cool. Pour into a non-metal container (like an old, cleaned, mustard jar) and cover. Chill at least 2 day to blend flavors.

Well I served it immediately. It was extremely strong. Clear your sinuses, bring tears to your eyes, "i just ate a spoonful of horseradish" strong. So I think the instructions probably mean, chill at least 2 days to let the mustard mellow out a bit... I hope so anyway. I'll let you know. This did not stop me from slathering it all of my chicken though. It just meant I had to blow my nose a few times and made some very amusing faces.
2 c Dry white wine
1 c Chopped Onion (I used a shallot. I think it was fine.)
2 Cloves Garlic, minced
4 oz Dry Mustard (I only had 2 oz of dry mustard, and...Get ready to be shocked...didn't check this until I already started boiling the wine... but it was ok, I halved the rest of the recipe and used the leftover wine in a salad dressing)
2 Tb Honey
1 Tb Vegetable Oil
2 tsp Salt
4 drops Tabasco sauce (or whatever hot sauce you've got.)

Put dry mustard into a small sauce pan and strain cooled wine mixture into it. Beat until very smooth. Add remaining ingredients and heat slowly, stirring constantly until mixture thickens.

Cool. Pour into a non-metal container (like an old, cleaned, mustard jar) and cover. Chill at least 2 day to blend flavors.

Well I served it immediately. It was extremely strong. Clear your sinuses, bring tears to your eyes, "i just ate a spoonful of horseradish" strong. So I think the instructions probably mean, chill at least 2 days to let the mustard mellow out a bit... I hope so anyway. I'll let you know. This did not stop me from slathering it all of my chicken though. It just meant I had to blow my nose a few times and made some very amusing faces.
Tuesday, March 9, 2010
Kumquat Extravaganza
Let's just not talk about why we've been out of touch for so long, it will only make it more awkward. Let's just be happy to be reunited.
About a month ago a friend gave DR a giant bag of kumquats from a back yard tree. If you didn't already know this, I am THRILLED beyond measure to help you eat your overwhelming backyard bounty. I can't think of very many things I would rather do than take a bag of homegrown produce off your hands. Bring on the late summer crook neck squash overflow, I promise to be just as willing to take that as I am to take your figs and avocados and your tangerine jam.
Though I am pretty sure there was no danger of them going bad since I was eating about five a day, I decided to take about a quarter of the kumquats and do an experiment I had been dying to try, preserving them. Actually, I had been dying to try preserving Meyer Lemons. Doesn't that just sound like all the good parts of being in a harem in Turkey around 900 AD? Preserved Meyer Lemons, so middle eastern, salty and sweet and sour. I'm afraid I missed the season on them this year, but I did have the kumquats and that almost seems more exotic.
It is also widely simple.
Rinse about 3 cups of kumquats. Cut a slit lengthwise down one side to the center (halfway). Put the fruit in a 3-4 cup jar with 2-3 tablespoons drained capers and a 1/4 cup kosher salt.
 Cover airtight and freeze for at least 8 hours, then place jar upside down in the refrigerator and let stand for 24 hours. Then you can use anytime within the next month or so, just turn the jar over few days to keep the salt distributed. The juice will leak out of the slits and mix with the salt.
 I think they kind of look like little orange jewels in soup. Lovely. I ate one on it's own. It was very salty. But then I realized you should probably rinse them before eating.
Now, besides just eating them what do you do with Preserved Kumquats? Why you make Kumquat-Red Pepper Relish!
4 preserved kumquats and 4 capers
1 7 oz jar peeled roasted red peppers. (I admit it, I bought a jar of roasted peppers. I could have roasted them myself, yes, of course I could have. But I didn't. Alright? I bought them.)
1 garlic clove
3/4 tsp cumin
1/4 tsp pepper
Rinse the kumquats and capers. (Important to not dehydrate yourself from all the salt) Coarsely chop kumquats, discarding seeds. (They have seeds!? I ate about 50 of these whole! Are kumquat trees growing in my stomach?!) Drain and chop red peppers. Mince garlic. In a bowl mix everything together. Serve or cover and chill up to two days. (I think about 8 hours is good to let it all marry together.)

I think this would be lovely poured over a cream cheese and spread on crackers. If I ever get around to making cream cheese (and crackers for that matter) I will do just that. But I served it for a lovely dinner with DR, my friend lex and her friend Josh. I hope Josh liked it because I found when the chicken was almost done that he was a vegetarian, so this was the bulk of his meal. He charmingly ate the potatoes that were roasted under the chicken...Anyway, I served the relish mixed with baby spinach, 1/4 cup cilantro, 2 tablespoons lemon juice and 1 tablespoon olive oil for a lovely spinach salad.

I'm unapologetically going to get another jar of peppers and make this again. (Peppers aren't in season, or I would roast them... in fact, I will this summer, promise, I just got a hibachi.)
About a month ago a friend gave DR a giant bag of kumquats from a back yard tree. If you didn't already know this, I am THRILLED beyond measure to help you eat your overwhelming backyard bounty. I can't think of very many things I would rather do than take a bag of homegrown produce off your hands. Bring on the late summer crook neck squash overflow, I promise to be just as willing to take that as I am to take your figs and avocados and your tangerine jam.
Though I am pretty sure there was no danger of them going bad since I was eating about five a day, I decided to take about a quarter of the kumquats and do an experiment I had been dying to try, preserving them. Actually, I had been dying to try preserving Meyer Lemons. Doesn't that just sound like all the good parts of being in a harem in Turkey around 900 AD? Preserved Meyer Lemons, so middle eastern, salty and sweet and sour. I'm afraid I missed the season on them this year, but I did have the kumquats and that almost seems more exotic.
It is also widely simple.
Rinse about 3 cups of kumquats. Cut a slit lengthwise down one side to the center (halfway). Put the fruit in a 3-4 cup jar with 2-3 tablespoons drained capers and a 1/4 cup kosher salt.


Now, besides just eating them what do you do with Preserved Kumquats? Why you make Kumquat-Red Pepper Relish!
4 preserved kumquats and 4 capers
1 7 oz jar peeled roasted red peppers. (I admit it, I bought a jar of roasted peppers. I could have roasted them myself, yes, of course I could have. But I didn't. Alright? I bought them.)
1 garlic clove
3/4 tsp cumin
1/4 tsp pepper
Rinse the kumquats and capers. (Important to not dehydrate yourself from all the salt) Coarsely chop kumquats, discarding seeds. (They have seeds!? I ate about 50 of these whole! Are kumquat trees growing in my stomach?!) Drain and chop red peppers. Mince garlic. In a bowl mix everything together. Serve or cover and chill up to two days. (I think about 8 hours is good to let it all marry together.)

I think this would be lovely poured over a cream cheese and spread on crackers. If I ever get around to making cream cheese (and crackers for that matter) I will do just that. But I served it for a lovely dinner with DR, my friend lex and her friend Josh. I hope Josh liked it because I found when the chicken was almost done that he was a vegetarian, so this was the bulk of his meal. He charmingly ate the potatoes that were roasted under the chicken...Anyway, I served the relish mixed with baby spinach, 1/4 cup cilantro, 2 tablespoons lemon juice and 1 tablespoon olive oil for a lovely spinach salad.

I'm unapologetically going to get another jar of peppers and make this again. (Peppers aren't in season, or I would roast them... in fact, I will this summer, promise, I just got a hibachi.)
Monday, February 15, 2010
Last week's shortbread.....a little late....
It was thunderstorming in LA and I wanted to have a proper tea with my good pal CCA and by extension, the Baby J. After forcing her to make me and the tiny dude some lunch, I thought I might make a pain of myself and cook up some shortbread. Just writing about it makes me want to make more....maybe in a sec. I might be shot if I don't make this entry.
So I stole some ideas from the interwebs and decided Smitten Kitchen as stolen from Alice Medrich was the best idea. Of course, I didn't read very well and missed the whole part about resting the dough for two hours. And I might have been able to guess it was more labor intensive than its 5 ingredients would lead one to believe if I had looked at the title, "Twice Baked Shortbread".....we were starving by the time all this was finished but it was worth it!
Twice-Baked Shortbread
Adapted from Alice Medrich’s Pure Dessert
12 tablespoons (1 1/2 sticks) unsalted butter, melted and still warm
5 tablespoons granulated sugar
1 teaspoon pure vanilla extract (I misread this, too and added a full tablespoon....but it was still delicious, if a little brown)
1/4 teaspoon salt
1 1/2 cups (6.75 ounces) all-purpose flour
Turbinado, Demerara or granulated sugar for sprinkling
Equipment: A baking pan with a removable bottom, such as a 9 1/2-inch round or a 4 by 14-inch rectangular fluted tart pan, or a one-piece 8-inch square pan
(We did this and it came out fine.)
If using a pan with a removable bottom, grease the pan; if using the one-piece 8-inch pan, line it with aluminum foil, leaving an overhang on two opposite sides.
In a medium bowl, combine the melted butter with the sugar, vanilla of your choice, and salt. Add the flour and mix just until incorporated. Pat and spread the dough evenly in the pan. Let rest for at least 2 hours, or overnight (no need to refrigerate).
Position a rack in the lower third of the oven and preheat the oven to 300 degrees F.
Bake the shortbread for 45 minutes.
Remove the pan from the oven, leaving the oven on. Lightly sprinkle the surface of the shortbread with sugar. Let the shortbread cool for 10 minutes.
Remove the shortbread from the pan, being careful to avoid breaking it. Use a thin sharp knife to cut it into oblong “fingers”, wedges, or squares. Place the pieces slightly apart on a parchment-lined baking sheet and put in the oven for 15 minutes. Cool on a rack.
Saturday, February 13, 2010
Vancouver Olympics
In honor of the Vancouver Olympics Opening Ceremony I made Pacific Northwest Salmon with salt, pepper and honey in the broiler. It was a pretty easy and simple meal, but delicious, served with a salad of mixed greens from my garden, avocado and green peppers and ranch dressing. I'm guessing there are not a lot of fresh veggies in Canada right now, but I bet they like ranch dressing, I mean french fries covered in cheese and gravy is their national dish after all.
I really enjoyed the opening ceremonies. It was of course no match for the precision and scale of the Beijing show, but seeing as Canada is a sparsely populated parliamentary democracy and not a totalitarian regime of 1.3 billion people, I think it is fitting that their demonstration of culture would be on a smaller scale, with a loser and more individual sensibility. They had lots of open space in the production which is fitting for the country. I'm glad that they didn't try to directly compete with the Chinese for spectacle.

I really enjoyed the opening ceremonies. It was of course no match for the precision and scale of the Beijing show, but seeing as Canada is a sparsely populated parliamentary democracy and not a totalitarian regime of 1.3 billion people, I think it is fitting that their demonstration of culture would be on a smaller scale, with a loser and more individual sensibility. They had lots of open space in the production which is fitting for the country. I'm glad that they didn't try to directly compete with the Chinese for spectacle.

(of course I didn't take this picture)
Thursday, February 11, 2010
Ranch Dressing
I know I said I didn't really miss anything, but I was wrong. I have been actively feeling the loss of ranch dressing for some time. I have made a great many very lovely vinagrette and mustard dressings over the last several months. But sometimes a girl just wants a thick, creamy coating on her lettuce and that's all there is to it.
The assembly of ranch dressing is really pretty simple, but it requires two ingredients that mean a substantial amount of planning is involved for me. Mayonnaise (and the mayo has to be successful, not an oily mess.) and Sour Cream. Full disclosure: I bought buttermilk this time instead of making it from lemon juice and whole milk. In my defense, this was an experiment to see if there is a difference when using it to do some chemistry-type kitchen magic, rather than just as an ingredient in a recipe. It turns out that yes, there is a difference. The lemon juice solution works out great if you are making buttermilk pancakes, and I suspect when using it as an ingredient in buttermilk ranch dressing. But if you are trying to turn regular cream into sour cream, you need some actual cultures, so real, cultured buttermilk is necessary. I don't know what the exact science is on this, but it makes sense to me anyway.
Also, this time I attempted to make the Mayonnaise in the blender as opposed to the hand mixer. This misadventure is chronicled in another post, I don't want to spoil it here.
So for the Ranch Dressing, I got the recipe from Pioneer Woman and all her glorious photography that ruins my self-esteem. You'll have to make do with my sad photos here.
 Here is the cast of characters. This is a pretty subjective recipe, you can add or subtract ingredients according to your taste and what you have.
I stared with 1 cup mayonnaise and 1/2 cup sour cream. But I ended up adding another 1/4 cup sour cream in the end (Because I got too heavy handed with the cayenne and I found it a little mayonnaise-y - store bought mayo may be less, you know flavorful, so try it a few ways)
 Next dice up 1 or 2 cloves of garlic, depending on your preference. (I almost never say "that was too garlicy" so I used 2, but you or the person who kisses you may feel differently.) After dicing add a healthy pinch of kosher salt and macerate the garlic with a fork or a mortar and pestle until it almost forms a paste.


The assembly of ranch dressing is really pretty simple, but it requires two ingredients that mean a substantial amount of planning is involved for me. Mayonnaise (and the mayo has to be successful, not an oily mess.) and Sour Cream. Full disclosure: I bought buttermilk this time instead of making it from lemon juice and whole milk. In my defense, this was an experiment to see if there is a difference when using it to do some chemistry-type kitchen magic, rather than just as an ingredient in a recipe. It turns out that yes, there is a difference. The lemon juice solution works out great if you are making buttermilk pancakes, and I suspect when using it as an ingredient in buttermilk ranch dressing. But if you are trying to turn regular cream into sour cream, you need some actual cultures, so real, cultured buttermilk is necessary. I don't know what the exact science is on this, but it makes sense to me anyway.
Also, this time I attempted to make the Mayonnaise in the blender as opposed to the hand mixer. This misadventure is chronicled in another post, I don't want to spoil it here.
So for the Ranch Dressing, I got the recipe from Pioneer Woman and all her glorious photography that ruins my self-esteem. You'll have to make do with my sad photos here.

I stared with 1 cup mayonnaise and 1/2 cup sour cream. But I ended up adding another 1/4 cup sour cream in the end (Because I got too heavy handed with the cayenne and I found it a little mayonnaise-y - store bought mayo may be less, you know flavorful, so try it a few ways)


Add this to your mayo/sour cream mix.
Next up would be chives if I'd had any, but I only had one green onion/scallion, so I chopped it up in the mini chopper and added it to the mix. Followed by a 1/4 cup flat leaf parsely. (I have a gross of this that despite using in almost every recipe seems to be breeding in my crisper)

Pretty much everything else is optional, and "too taste". I wish I could tell you the quantities that I used, but in reality I just put in "some" Worcestershire sauce, white vinegar, cayenne pepper, paprika, hot sauce and dried basil. Then I thinned it out with a bit of buttermilk*. (My mayo was a little thinner than store bought would be, so you may need more than a bit of buttermilk to achieve the right consistency.) Last I added some salt, then a little more salt. You just have to keep tasting all along to see what you think. Pioneer Woman had a good suggestion that I didn't take, but you might... use a piece of lettuce to taste it so you get a more accurate sense of how it will work in the real world, since you won't be using it on a tip of your pinkie salad, at least not every time you serve it.
Then cover her up, and stick her in the fridge for two hours to think about what she's done, as my friend and sous-chef, Jan Smelk would say. Then you are ready to smother all your healthy veggies with some creamy, fatty goodness.

Here is list of ingredients optional ingredients, but you are only limited by your own taste and imagination:
- 1 clove (to 2 Cloves) Garlic
- Salt To Taste
- ¼ cups Italian Flat-leaf Parsley
- 2 Tablespoons Fresh Chives
- 1 cup (real) Mayonnaise
- ½ cups Sour Cream
- Buttermilk* (as Needed To Desired Consistency)
- White Vinegar (optional, To Taste)
- Worcestershire Sauce (optional, To Taste)
- Fresh Dill (optional, To Taste)
- Cayenne Pepper (optional, To Taste)
- Paprika (optional, To Taste)
- Fresh Oregano (optional, To Taste)
- Tabasco (optional, To Taste)
- Dried Basil (optional, To Taste)
Blender Mayonnaise
Julia Child gives us a recipe for making mayonnaise in the blender, but that doesn't mean she approves of it. She goes so far as to say "no culinary skill whatsoever enters into its preparation." Ouch! Despite this admonition, I still almost burnt out the engine on my blender and ultimately switched to finishing it with the hand mixer, so I'm not sure what that says about me.
I tried it in the blender, not because I am avoiding achieving mastery of the egg yolk. On the contrary, I want very much to lord over the egg yolk. But after my most recent debacle with the "I Know How to Cook" mayo recipe, my friend Lala suggested I try it in the blender and that it is just a snap. I thought I might as well give it a shot so that I could at least disdain it as "too easy" with the same authority as Julia. Sigh.
Assemble the Players:
 1 whole egg
1/4 tsp dry mustard
1/2 tsp salt
1 Tb lemon juice or wine vinegar (I opted for vinegar)
1 cup olive oil or vegetable oil (I used olive oil)
Break the egg into the blender jar. Add the mustard and salt. Cover and blend at top speed for 30 seconds, or until the mixture is thick and foamy.


I tried it in the blender, not because I am avoiding achieving mastery of the egg yolk. On the contrary, I want very much to lord over the egg yolk. But after my most recent debacle with the "I Know How to Cook" mayo recipe, my friend Lala suggested I try it in the blender and that it is just a snap. I thought I might as well give it a shot so that I could at least disdain it as "too easy" with the same authority as Julia. Sigh.
Assemble the Players:

1/4 tsp dry mustard
1/2 tsp salt
1 Tb lemon juice or wine vinegar (I opted for vinegar)
1 cup olive oil or vegetable oil (I used olive oil)
Break the egg into the blender jar. Add the mustard and salt. Cover and blend at top speed for 30 seconds, or until the mixture is thick and foamy.

Pour in the lemon juice or vinegar, and blend for 10 seconds.
Take the center lid out and pour the oil into it, while blending at high speed. Be sure to pour the oil in slowly in a very thin stream of droplets. I use this ketchup dispenser with a very narrow nose that I got at the 99¢ store.

Supposedly the sauce will begin to thicken after about 1/2 cup of the oil has been added. However, after about 1/4 cup my blender started to smell and make unpleasant sounds, and when I took it off it looked like this:

This didn't seem like a good thing. So I poured it into a bowl, crossed my fingers that a hybrid technique would work and plugged in the hand mixture. After about 30 minutes of gentle coaxing and painstakingly slow oil addition and eventually raising to top speed the sauce began to thicken. Ultimately it wasn't quite as thick as I would want, and I didn't need to take any of the recommended thinning measures, but it was mayonnaise nonetheless.

I am often perplexed as to why such seemingly simple tasks elude me, but it looks like I am going to stick with the original method and hope for the day when mastery is achieved and I can whip this up in 10 minutes as Julia promises.
Wednesday, February 10, 2010
Meatballs with Prunes
Last night I suggested this to my husband and like a twelve year old boy who thinks prunes are just for old people with bathroom trouble he said, "That sounds gross". Now I admit it sounds better in French Boulet aux Pruneaux which is how I read it in a French cookbook, so I knew right away that this would be delicious.
It was quite simple to make and we had most of the ingredients on hand. Including the prunes, which my husband asked me to buy, specifically because he wanted to eat more foods favored by old people so that he could avoid eventual bathroom trouble. He ended up admitting that this was a wonderful combination, and that he had fallen victim to what he thinks is a very American misconception about not mixing "good for you" with "good". It does seem that a lot of the time we think in order to be healthy we have to be sacrificing, and if something is rich and delicious it must be an indulgence, something to feel guilty about. I think my favorite part of this whole project is discovering how much rich, delicious, "decadent" food I have been able to eat, while losing weight and feeling healthier. I don't assign any of my mental energy to worrying about how much fat, or how many calories are in any of the recipes. I make no substitutions based on cutting fat or calories. I don't concern myself with how many carbs I'm consuming, or what my carb-to-protein ratio is. Primarily my concerns are, using up the vegetables that come in my CSA box before they go bad, using my time wisely to make sure we have food made when we need it, and so I am not cooking all. the. time. Since I see every ingredient that goes into everything I'm never taken by surprise or tricked into thinking something is healthier than it is. And honestly, I think it is hard to make food that is truly bad for you when you are pretty much working with things that were grown from the ground, or fed from the ground, rather than conjured in a lab. Oh dear, I'm starting to sound like a preachy zealot... suffice it to say, this is working out nicely for me, I'm learning a ton, eating lots of wonderful food and really not missing much of anything most of the time. On to this delightful recipe.
I found it in the Chocolate & Zucchini cookbook. This is the cookbook version of the blog by the same name. This is the first recipe I have made out of it, but it's a lovely and really enjoyable cookbook with delightful musings on food and entertaining by the author Clothide Dusoullier. (It turns out she consulted on a food show called Bizarre Foods that my friend Superterrific worked on a few years back, when they did an episode in Paris... the food world keeps getting smaller)
I made some modifications to this recipe to accommodate ingredients I had on hand, I will note them in the recipe.
Ingredients:
1 pound ground meat (She suggests lamb, but I had grass fed ground beef, so that's what I used. I'm sure lamb would be richer and more luxurious tasting, but the beef worked out well.)
12 good quality prunes (sometimes called dried plums for reasons of perception mentioned above) Pitted and finely chopped
2 small shallots, finely chopped
1 garlic clove, finely chopped
1/4 cup (packed) fresh, flat-leaf parsley, finely chopped, plus some extra for garnish
1 tablespoon orange zest, freshly grated and finely minced from two oranges. (I used clementines)
1/4 teaspoon allspice (I did not have any allspice, so I used almost a 1/4 tsp cinnamon, about an 1/8 tsp ginger and a dash of nutmeg. I would have used a ground clove, but I didn't have one.)
1 large egg, lightly beaten
1 Tablespoon, plus 1 teaspoon extra virgin olive oil
1/2 teaspoon sea salt
1/4 teaspoon freshly ground black pepper
In a medium mixing bowl, combine the meat, prunes, shallots, garlic, parsley, orange zest, allspice, egg, 1 Tablespoon olive oil, salt and pepper. Mix well with a fork. Cover and refrigerate from 10 minutes up to 8 hours. (I put it in there for about 45 minutes)
Remove the bowl from the refrigerator. Wash your hands well, and keep them damp. Scoop out rounded tablespoons of the mixture and roll them into balls between your palms. Set aside in a single layer on two plates until you've used up all the meat. Wash your hands again.
Heat 1 teaspoon olive oil in a large non-stick skillet over medium heat. Add half of the meatballs in a single layer without crowding. Cook for 8-10 minutes, stirring the meatballs gently around the pan to brown them all over. Set aside on a clean plate and cover with foil while you cook the second batch. Return the first batch to the pan and cover, reheat for 2 minutes.
Serve over a bed of cous-cous and drizzle a little yogurt over the top and sprinkle some additional chopped parsley on top and a lovely green salad on the side.
I have some pictures of this, but it keeps failing when I try to upload them, so I will have to try it again later. For now use your imagination.
Friday, February 5, 2010
Butternut Squash Puree
I made this in the middle of my tamale making adventure, while I was waiting for the chicken stock to cook and the corn husks to soften. I bought a butternut squash almost two weeks ago on a whim and kept putting off doing anything with it.
I got this recipe off of The Pioneer Woman blog. It couldn't be simpler. She took about a million really beautiful pictures, and I don't even want to try to compete with them, so you will have to check out her site if you want a visual on this.
Basically. Cut a butternut squash in half, scoop out the seeds and membranes. Place the halves, cut side down on a baking sheet with about an inch of water. Bake for about 30 minutes (until soft when pierced with a fork) at 350º F.
Scoop the softened flesh out of the skin into a bowl with half a stick of butter, cut into pieces. Mash up and add 2-4 tablespoons maple syrup. Put the whole mess in the blender and puree until smooth. Voila Deliciousness! This can easily be cooled, refrigerated and reheated over the next couple of days.
Thursday, February 4, 2010
Tamales for Diá de la Candelaria
February 2nd is a major holiday that I don't think has been getting it's due. First of all, it's Groundhog's Day, which is best celebrated with a viewing of the Bill Murray movie of the same name. But I think lesser known is the Catholic Celebration of Candelmas or Candelaria as it is known in Mexico where it is more widely celebrated. Jesus had remarkable timing, coinciding so many major events of his life with existing pagan holidays, making it conveniently unnecessary for banks and government agencies to change their closure schedules. Candelaria is the Feast of the Presentation of Christ at the Temple. It was traditional in those days for a baby to be presented at the temple 40 days after birth. This just happened to coincide with the mid-way point between the winter solstice (Christmas) and the spring equinox (Easter).
In Mexican household this event is marked with a feast of tamales. The tamales are made by the person who found the figurine of the Baby Jesus in the King Cake (Rosca de Reyes) on Three Kings Day (Diá de los Tres Reyes), January 6th the day the Three Kings arrived to see Jesus. This is also known as Twelfth Night, or the last day of Christmas.
I missed celebrating Three Kings Day this year, so I figured if I didn't make the tamales for Candelaria this year, it would slip by unnoticed as well. I searched around a bit for a recipe and decided on one I found on epicurious.com. I doubt it's the most authentic one I could come up with, but it was un-intimidating enough for this novice gringa to try.
Originally my friend Jan Smelk was going to join me for the adventure, but a homeless kitten ended up in her life on Tuesday morning, so she had to spend the day acclimating said kitty to the luxuries of a litter box, food that isn't scavaged and a cat roommate. So I was on my own. Jan was also supposed to bring a large stock pot and steamer insert, so not having those was my first set back.
I had bought the masa flour a couple weeks ago when I got it in my head that I wanted to celebrate Candelaria.


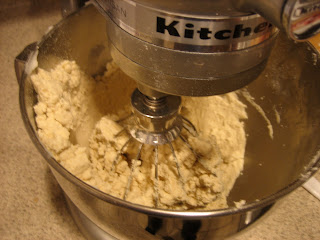
On to the dough. This was my second opportunity to use my beautiful new standing mixer. So exciting! To begin you mix 1 & 1/3 cup vegetable shortening (or lard) with salt & baking powder. (If your masa doesn't contain those ingredients already, mine does not)


In Mexican household this event is marked with a feast of tamales. The tamales are made by the person who found the figurine of the Baby Jesus in the King Cake (Rosca de Reyes) on Three Kings Day (Diá de los Tres Reyes), January 6th the day the Three Kings arrived to see Jesus. This is also known as Twelfth Night, or the last day of Christmas.
I missed celebrating Three Kings Day this year, so I figured if I didn't make the tamales for Candelaria this year, it would slip by unnoticed as well. I searched around a bit for a recipe and decided on one I found on epicurious.com. I doubt it's the most authentic one I could come up with, but it was un-intimidating enough for this novice gringa to try.
Originally my friend Jan Smelk was going to join me for the adventure, but a homeless kitten ended up in her life on Tuesday morning, so she had to spend the day acclimating said kitty to the luxuries of a litter box, food that isn't scavaged and a cat roommate. So I was on my own. Jan was also supposed to bring a large stock pot and steamer insert, so not having those was my first set back.
I had bought the masa flour a couple weeks ago when I got it in my head that I wanted to celebrate Candelaria.

On Sunday I bought the tomatillos and serrano chiles, both first time purchases for me. My friend SuperTerrific offered me her large container of lard that she didn't think she would have cause to use up in exchange for the opportunity to eat some tamales and I had everything else on hand except the corn husks.
Tuesday:
I set about preparing the filling. I husked the tomatillos

and put arranged them on aluminum foil in a broiler pan, and broiled them for about 5 minutes on each side until they were black in spots.

Then I poured the blackened tomatillos and accumulated juices into the blender and let them cool for a while while I chopped up the garlic and serrano chiles.

Here is where our second problem started. I began very carefully, scraping the seeds out of the chiles with a knife, not touching them with my hands at all. Then around the third chile, for some reason I decided such care was not necessary and just started scraping the seeds out with my fingers, using my thumbnails to dig out the ones that clung to the flesh of the chile. Why did I do this, you are probably wondering... I am wondering this myself. I distinctly remember the thought process of "I must be careful with these seeds or my hands will be burning from the oils" and I sort of remember a mental switch to a more careless approach. I don't know why my more cautious and reasonable self didn't prevail, and I am very sorry for that fact. It was gradual, but slowly over the next half hour or so three fingers on my right hand, the tips of my left index and ring fingers and especially underneath both of my thumbnails began to heat up. No amount of hand washing in hot or cold water had any effect. I took a break from the cooking and gave Baby J a bath. The twenty minutes of submerging my hands in bath water did nothing to assuage the heat. I did a little internet searching. Most of the advice said, "Where gloves"... thanks, that helps a lot right now. Some of the more useful suggestions where, soak your hands in alcohol (No rubbing alcohol here, so I tried rum), bleach, milk, lavender lotion, washing in very hot water... I tried all of these things. They each seemed to work for about five minutes, then the heat would just creep back. It's a miracle I didn't rub my eyes during this odyssey. Eventually after about three hours of being driven to distraction the discomfort sort of ebbed away and I was able to turn my thoughts to something other than relief, but my zeal for this project was rather deflated for the day.
As I had mentioned before, Jan Smelk was going to bring a stock pot and steamer insert, so I had to forage for one on my own. I had intended to make the tomatillo sauce then go out and search for one. I had looked on line and the options for getting a Calphalon steamer insert to go with my stock pot was around $70, which was way more than I wanted to invest in making tamales. I was hoping a cheaper solution could be found in some of the strange housewares markets in my neighborhood. As I said, after the burning hands incident, I couldn't face another challenge, so that had to wait until the next day... so much for celebrating Candelaria on the day, but I'm guessing Jesus hung around the temple for a few days.
Back to the cooking. I added the diced garlic and chiles to the tomatillos and blended it all up into a nice puree. At the same time I heated some oil in a pot, then added the puree and boiled it for 5 minutes. Then I added 2 cups of chicken stock, reduced the heat and let it simmer until it reduced to about one cup, about 40 minutes.

At this point you are supposed to add four cups of shredded chicken, (They suggest purchasing a rotisserie chicken - but you know I can't do that.) I had to roast a chicken.

So the tomatillo sauce went in the fridge and the chicken went in the oven. I threw some potatoes in the roasting pan as well because it seems a waste of an opportunity to have some delicious potatoes if you are going to the effort of roasting anyway, and I was getting pretty hungry and I knew no tamales were going to be eaten that day. So I ate the chicken wings and potatoes while the rest of the chicken cooled, then I put the whole chicken in a ziploc bag and went to bed.
Wednesday:
I pulled all the chicken off the bone and shredded it. It made just over four cups, packed. Then I chopped about 2/3 cup cilantro in the mini chopper and mixed it with the chicken and poured the tomatillo sauce over the whole thing.

Next I set out to find the steamer insert needed to actually cook this mess. I got Baby J into his enormous stroller that is awkward and unwieldily in small shops. Just perfect this kind of adventure. On my third shop I found just the thing.

It cost $6, was tall enough for the tamales to stand up and would slide right into a stock pot. One problem. It is about 2" too wide to fit into my stock pot. I observed this when I was purchasing it. Now, you may have perceived already that sometimes I don't think things all the way through, so it may comes as no surprise to you to learn that I bought it anyway, did not investigate the possibility of also buying a stock pot that would accommodate this steamer, and took it home certain I could rig something up. (Rigging things up is not really a skill I possess. Misguided optimism is.) Well I got home, confirmed that it didn't fit in my stock pot, pulled out several other types of pots, confirmed that it didn't fit in any of those either and had to go back to the store to see if they had a stock pot that would fit. They did. It cost $10, cheap enough that I should have bought it the first time, even if I believed that rigging was a possibility.

While out buying the steamer I also picked up a bag of corn husks and I put them in water to soak before I went back out for the stock pot.
At this point I realized that I had used up all of my reserves of chicken stock making the filling and didn't have any for the dough. Luckily, I saved the carcass from the chicken I roasted, so I threw that in my other, too narrow stock pot with a bag of potato, onion, carrot, parsley, etc. clippings I had been keeping in the freezer... Only about four hours to wait until that's ready to go...
In the interim I made a lovely Butternut Squash Puree with a squash that needed to be used.
On to the dough. This was my second opportunity to use my beautiful new standing mixer. So exciting! To begin you mix 1 & 1/3 cup vegetable shortening (or lard) with salt & baking powder. (If your masa doesn't contain those ingredients already, mine does not)

Beat this in the mixer until it is nice and fluffy.

Then beat in 4 cups of masa in four 1 cup additions.

Reduce the speed to low, and gradually beat in 1 1/2 cups of chicken stock.

Use the remaining half cup of stock to soften the dough to your desired consistency. (This is where having a grandmother whose been making tamales for fifty years would come in handy, to tell you what your desired consistency is...I don't have one of those.)
Assembly:
Now fill your pot with enough water so that it is just touching the bottom of the steamer insert. Line the bottom of the steamer with softened corn husks. Then tear three large husks in to 1/4" wide strips to use as ties and set aside.
Open a husk on your work surface. Scoop 1/4 cup of dough onto the center and spread our into a four inch squareish shape. Leaving about 2-3" clear at the narrow end of the husk.

Spoon a heaping tablespoon of filling in a strip down the center of the dough. (You will probably want to shred the chicken more than I did. It's too chunky, as you can see here, I think it would make the whole thing juicier.)

Fold long sides of husk and dough over filling to cover. Fold up narrow end of husk. Tie folded portion with strip of husk to secure, leaving wide end of tamale open.

Repeat until all the dough or filling has been used. (I still had about half of the filling left when I ran out of dough, but the recipe says it makes about 26 tamales and I only ended up with 16, so I probably used too much dough.)
Stand tamales in the steamer basket.


Bring water in pot to boil. Cover pot and steam tamales until dough is firm to touch and separates easily from husk, about 45 minutes. Let stand 10 minutes, then serve.

I ate this by myself at about 11pm on February 3rd. So I wouldn't say it was a traditional Candelaria celebration. But I'm pretty sure that Baby Jesus appreciates a long journey towards a goal, and I'm all set for next year now.
Though I read that traditionally tamales are served dry and that sauce is more of a Mexican-American thing, since I am in America, I recommend making some extra tomatilla sauce to spoon over the top.
Here is the recipe in a more concise form
Filling
1 8-ounce package dried corn husks
1 pound tomatillos, husked, rinsed
4 3-inch-long serrano chiles, stemmed, chopped
4 large garlic cloves, chopped
1 1/2 tablespoons olive oil
2 cups low-salt chicken broth
4 cups (packed) coarsely shredded cooked chicken (about 1 pound; from purchased rotisserie chicken)
2/3 cup chopped fresh cilantro
Dough
1 1/3 cups lard or solid vegetable shortening
1 1/2 teaspoons salt (omit if masa mixture contains salt)
1 1/2 teaspoons baking powder (omit if masa mixture contains baking powder)
4 cups freshly ground masa dough for tamales (34 to 36 ounces), or make masa dough with 31/2 cups masa harina (corn tortilla mix; about 17 ounces) mixed with 2 1/4 cups warm water
2 cups (about) low-salt chicken broth
For filling:
Place husks in large pot or large bowl; add water to cover. Place heavy plate on husks to keep submerged. Let stand until husks soften, turning occasionally, at least 3 hours and up to 1 day.
Preheat broiler. Line heavy baking sheet with foil. Arrange tomatillos on prepared sheet. Broil until tomatillos blacken in spots, turning once, about 5 minutes per side. Transfer tomatillos and any juices on sheet to processor and cool. Add chiles and garlic to processor and blend until smooth puree forms. Heat oil in medium saucepan over medium-high heat. Add tomatillo puree and boil 5 minutes, stirring often. Add broth. Reduce heat to medium; simmer until sauce coats spoon thickly and is reduced to 1 cup, stirring occasionally, about 40 minutes. Season with salt. Mix in chicken and cilantro. (Can be made 1 day ahead. Cover and chill.)
For dough:
Using electric mixer, beat lard (with salt and baking powder, if using) in large bowl until fluffy. Beat in fresh masa or masa harina mixture in 4 additions. Reduce speed to low and gradually beat in 1 1/2 cups broth, forming tender dough. If dough seems firm, beat in enough broth, 2 tablespoons at a time, to soften.
Fill bottom of pot with steamer insert with enough water (about 2 inches) to reach bottom of insert. Line bottom of insert with some softened corn husks. Tear 3 large husks into 1/4-inch-wide strips to use as ties and set aside. Open 2 large husks on work surface. Spread 1/4 cup dough in 4-inch square in center of each, leaving 2- to 3-inch plain border at narrow end of husk. Spoon heaping tablespoon filling in strip down center of each dough square. Fold long sides of husk and dough over filling to cover. Fold up narrow end of husk. Tie folded portion with strip of husk to secure, leaving wide end of tamale open. Stand tamales in steamer basket. Repeat with more husks, dough, and filling until all filling has been used. If necessary to keep tamales upright in steamer, insert pieces of crumpled foil between them.
Bring water in pot to boil. Cover pot and steam tamales until dough is firm to touch and separates easily from husk, adding more water to pot as necessary, about 45 minutes. Let stand 10 minutes. (Can be made 2 days ahead. Cool 1 hour. Cover and chill. Before serving, re-steam tamales until hot, about 35 minutes.)
Tuesday, February 2, 2010
Pan-Roasted Pork Chops with Cranberries and Red Swiss Chard
This was dinner for my brother Mike's birthday. I served the pork chops and chard alongside the Sehr gute Kartoffeln (roasted potatoes) which are my current obsession. The chard, thyme and potatoes came in my Farm Share, and I had some chicken stock that needed to be used, so this meal worked out beautifully for using things up and being delicious at the same time. I got the recipe from epicurious.com
For Swiss chard
1/3 cup minced shallots (2 medium)
1 tablespoon minced garlic
2 tablespoons unsalted butter
1 lb red Swiss chard, stems and center ribs cut out and chopped together, leaves coarsely chopped separately. (I think the color on these stems is just gorgeous!)


For pork chops
4 (1 1/4-inch-thick) rib pork chops
1 1/2 tablespoons extra-virgin olive oil
For sauce
1/3 cup minced shallots (2 medium)
1/2 cup dry red wine
1 cup fresh or thawed frozen cranberries (4 1/2 oz)
3/4 cup chicken stock or broth
3 tablespoons packed light brown sugar
1 1/2 teaspoons chopped fresh thyme or 1/2 teaspoon dried, crumbled
2 tablespoons unsalted butter

Preheat oven to 400°F.
Prepare Swiss chard:
Cook shallots and garlic in butter in an ovenproof 12-inch heavy skillet over moderate heat, stirring, until golden, about 5 minutes. Add chard stems and center ribs and cook, covered, stirring occasionally, until crisp-tender, 3 to 4 minutes.


Season with salt and pepper, then transfer chard to a heavy saucepan and wipe out skillet.
Cook pork chops:
Pat chops dry and season with salt and pepper. Heat oil in skillet over moderately high heat until hot but not smoking, then brown chops, about 3 minutes per side.

Transfer skillet to oven and roast until an instant-read thermometer inserted horizontally 2 inches into meat registers 155°F, 7 to 9 minutes. Transfer chops with tongs to a platter, leaving fat in skillet, and cover chops loosely with foil to keep warm.
Make sauce:
Sauté shallots in fat remaining in skillet over moderately high heat, stirring, until golden, about 5 minutes. Add wine and deglaze by boiling over high heat, scraping up brown bits, until reduced by half. Add cranberries and stock and simmer, stirring occasionally, until cranberries begin to burst, about 2 minutes.

Stir in brown sugar and thyme and simmer, stirring, until berries are collapsed, about 3 minutes. Remove from heat and stir in butter until incorporated, then season with salt and pepper.
Assemble dish:
While sauce is cooking, reheat chard over moderate heat, stirring. Divide among 4 plates and top with chops, then spoon sauce over.

For Swiss chard
1/3 cup minced shallots (2 medium)
1 tablespoon minced garlic
2 tablespoons unsalted butter
1 lb red Swiss chard, stems and center ribs cut out and chopped together, leaves coarsely chopped separately. (I think the color on these stems is just gorgeous!)


For pork chops
4 (1 1/4-inch-thick) rib pork chops
1 1/2 tablespoons extra-virgin olive oil
For sauce
1/3 cup minced shallots (2 medium)
1/2 cup dry red wine
1 cup fresh or thawed frozen cranberries (4 1/2 oz)
3/4 cup chicken stock or broth
3 tablespoons packed light brown sugar
1 1/2 teaspoons chopped fresh thyme or 1/2 teaspoon dried, crumbled
2 tablespoons unsalted butter

(As usual I was running about an hour behind on getting dinner on the table, so these are the only pictures I took. Nothing of the final product... I remembered as soon as we were done eating.)
Preheat oven to 400°F.
Prepare Swiss chard:
Cook shallots and garlic in butter in an ovenproof 12-inch heavy skillet over moderate heat, stirring, until golden, about 5 minutes. Add chard stems and center ribs and cook, covered, stirring occasionally, until crisp-tender, 3 to 4 minutes.

(I made this again and remembered to take some pictures, so here they are)
Add leaves and cook, uncovered, stirring occasionally, until tender, 6 to 7 minutes.
Season with salt and pepper, then transfer chard to a heavy saucepan and wipe out skillet.
Cook pork chops:
Pat chops dry and season with salt and pepper. Heat oil in skillet over moderately high heat until hot but not smoking, then brown chops, about 3 minutes per side.

Transfer skillet to oven and roast until an instant-read thermometer inserted horizontally 2 inches into meat registers 155°F, 7 to 9 minutes. Transfer chops with tongs to a platter, leaving fat in skillet, and cover chops loosely with foil to keep warm.
Make sauce:
Sauté shallots in fat remaining in skillet over moderately high heat, stirring, until golden, about 5 minutes. Add wine and deglaze by boiling over high heat, scraping up brown bits, until reduced by half. Add cranberries and stock and simmer, stirring occasionally, until cranberries begin to burst, about 2 minutes.

Stir in brown sugar and thyme and simmer, stirring, until berries are collapsed, about 3 minutes. Remove from heat and stir in butter until incorporated, then season with salt and pepper.
Assemble dish:
While sauce is cooking, reheat chard over moderate heat, stirring. Divide among 4 plates and top with chops, then spoon sauce over.

Subscribe to:
Posts (Atom)